In the previous part we have created and published our first website. I admit, the website has very little content and doesn’t yet look particularly appealing. We want to change this now. In this part you will learn how you can use CSS to style the page. In a later part we will add more style to our website with the help of a framework called Bootstrap.
Structure and Style
Just as a reminder: HTML describes the structure of a web page while CSS defines the visual appearance.
Separating structure and style has many advantages, as we shall see. It is not mandatory, but usually it is better to also write HTML and CSS in separate files.
Linking to a CSS File
A CSS file is an ordinary text file with the extension .css. We will link to the CSS file from within the HTML file.
Create a New File in your Portfolio folder. Name the new file main.css.

Now open your index.html and add a <link> element inside the <head> element. With the <link> element, we tell the HTML page to load the CSS file:
Link to the CSS File
<link rel="stylesheet" href="main.css">
Insert this element in your <head> block. Now your code should look like the following:
<!DOCTYPE html>
<html>
  <head>
    <meta charset="utf-8">
    <link rel="stylesheet" href="main.css">
    <title>Web Portfolio of Marco</title>
  </head>
  <body>
    <h1>Web Portfolio of Marco</h1>

    <h2>Welcome!</h2>

    <p>Thanks for stopping by.</p>

    <p>Please have a look around. In the blog section I document my experiences in programming. You may also look at my web projects. Have fun.</p>

    <img src="marco.jpg" alt="Picture of me">

    <p>Marco :-)</p>
  </body>
</html>
href attribute must contain the correct file path. We only have one main.css and it is in our root folder. With the leading / we can get to the root folder from anywhere, even if our HTML file is in a subfolder. Our CSS file can thus always be loaded with href="/main.css". Learn more about this in part 1 under relative and absolute URL's.
Colors
Up to this point the CSS file is still empty. Let’s write our first lines of CSS. In CSS we write so-called CSS rules. With a CSS rule we can specify what the browser should do with a specific part of our HTML.
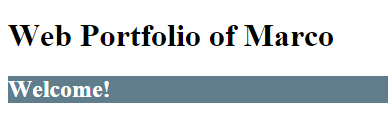
As an example, we will change the background color and text color of the second heading. Write the following lines in your CSS file.
main.css
h2 {
  background-color: #607d8b;
  color: #ffffff;
}
The result should look like this:
Color Codes
Colors are created on a screen by a mixture of different portions of red, green and blue (RGB). The combination of red, green and blue can be expressed in CSS in two ways: as RGB values or as Hexadecimal values (hex values). The Hexadecimal notation is the most common.
Let’s look at our example with the blue-gray background color from above:
- As Hex values:
#607d8b - As RGB values:
rgb(96, 125, 139)
In the Hex notation, the first two characters represent the red channel, the middle characters the green channel, and the last two characters represent the blue channel.
Working with Color Codes
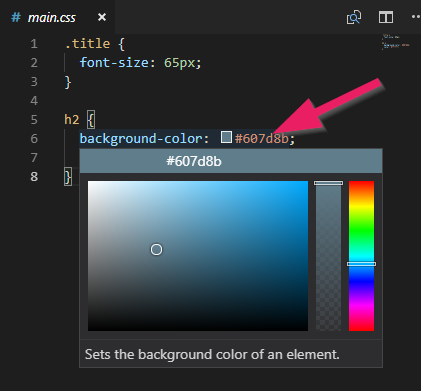
Expressing colors with hexadecimal values is very popular because with it you can represent a huge amout of color combinations (over 16.7 million). However, it is somewhat difficult to work with them. In most cases, you will need a color picker.
If you are using Visual Studio Code as editor you can open a color picker right in your CSS file: Hover over the color code and you should see a color picker appear.
Online Color Pickers
If you do not have a color picker integrated in your editor, you can turn to numerous online color selectors:
- HTML Color Codes
- ColorPicker
- And many more…
Online Color Palettes
In most cases you’ll need more than just one color for your website. You’ll need a color palette. With just a simple color picker it is quite difficult to pick colors that work well together.
There are several tools that make finding a color palette easier. Here are a few examples:
Predefined Color Palettes
Color Palette Generators
- Kuler - define a color rule, pull the knob with the small arrow and you’ve got five colors that fit together
- Paletton - a sophisticated controller for finding color palettes
- ColourCode - another practical palette generator
CSS Rules
You have already seen how CSS rules can change the color of an HTML element. Let’s look more closely at how CSS rules are constructed.
A CSS rule consists of three elements, a selector, a property, and a value.
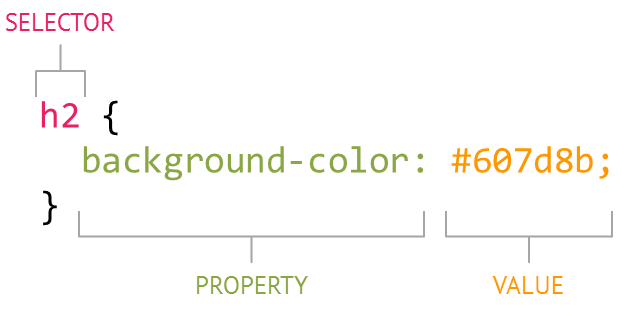
This rule states that all <h2> elements should get a background color of #607d8b.
CSS Selectors
Selectors indicate which HTML elements a CSS rule is applied to.
Type Selectors
The type selector targets all elements with a specific HTML tag. If we wanted to address all p elements, as an example, this would look like the following:
CSS
p {
  ...
}
HTML
<p>...</p>
<p>...</p>
Class Selectors
Class selectors are used very frequently. They are a bit more specific than type selectors, as they target a particular group of elements rather than all elements of one type.
To use class selectors add a class attribute to an element and give it an arbitrary value. In CSS, you can now address all elements that have the same class attribute. Classes are denoted by a leading period, followed by the class value.
In the following example, the class selector targets all elements that have a class attribute with the value highlight.
CSS
.highlight {
  ...
}
HTML
<p class="highlight">...</p>
<p>...</p>
<p class="highlight new">...</p>
In this HTML, the CSS rule would be applied to the first and third p elements. As you can see, it is also possible for an item to have multiple classes (highlight and new), separated by a space.
ID Selectors
Id selectors are very similar to class selectors. They select all HTML elements with an attribute id with a specific value. Ids are denoted by a leading hash sign (#), followed by the id attribute value.
The important difference to class selectors is that ID selectors should occur only once per HTML page, while a class may be used for any number of elements.
In the following example, the ID selector selects the element that has an id attribute with value navigation.
CSS
#navigation {
  ...
}
HTML
<p id="navigation">...</p>
<p>...</p>
More Selectors
There are a few more selectors (Google is your friend). But the most important once are described above.
CSS Properties
CSS rules determine how HTML elements should be displayed. There are many properties that can be defined in CSS. Two of them we have already seen, background-color and color.
I will not explain more of the many CSS properties here. But I want to show how you can learn more CSS knowledge by yourselves. It makes more sense when you learn them when you actually have a specific need for them. There are two scenarios on how to proceed.
Case 1: You see a CSS property that you do not know …
… search the internet for the property. Use the property name together with CSS as your search term. You could try it right now by figuring out what the following CSS rule does:
padding: 5px;
Use CSS padding as your search term. Do not settle only for the first search result but open the first 5 or more. Then decide on which website you want to read the details.
Try to apply this CSS rule to the h2 element in your portfolio project.
Case 2: You want to change something but you do not know the CSS property …
… search the internet for what you want to do togehter with the keyword CSS in your search terms. You will probably need several tries before you find what you were looking for.
An example: Let’s say you want to change the text size. In this case use text size CSS as search terms. Again, do not settle only for the first search result.
CSS Values
We have already seen a few CSS values: For example, hexadecimal values like #ffffff or size specifications like 5px. Depending on the CSS property you must sometimes use specific words such as left or right for text alignment, for example.
One of the most frequently used CSS values are size specifications. Therefore, we’ll look at them in more detail.
Often the size is defined in pixels, which is abbreviated as px.
p {
  font-size: 16px;
}
Another possibility is to indicate sizes in percentages. Percentages are always relative to a parent element. If, in the following example, the parent of p spans the whole width of the screen, p will be 60% of that width.
p {
  width: 60%;
}
Another popular unit for sizes is em. An em is always relative to the font size. This means that if you change the font size the size of one em will also be changed.
An example: If an element has a font size of 20px and a width of 5em, the width of the element would then be 100px.
p {
  font-size: 20px;
  width: 5em;
}
Class Selectors in Our Portfolio
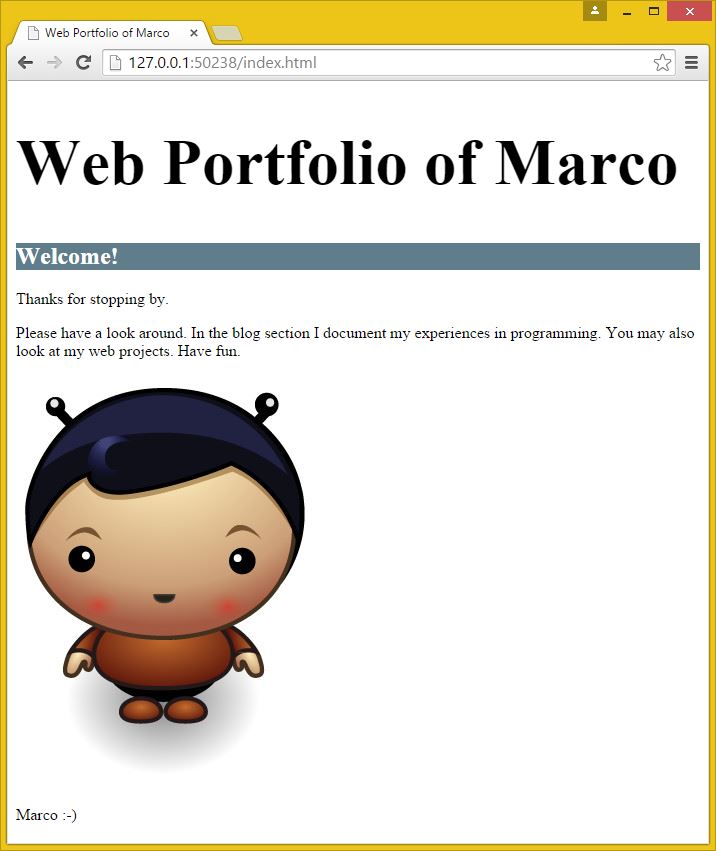
Let’s say we want to enlarge the main heading “Web Portfolio of Marco”. That would obviously be possible by defining a CSS rule for the h1 element like this:
h1 {
  font-size: 65px;
}
The problem with this is that all h1 elements on our entire website will be enlarged. But if we only want to enlarge the first heading, we should better use a class selector.
To do this we add a class attribute to the h1 element in HTML. We can assign any value for that class, I chose the value title.
<h1 class="title">Web Portfolio of Marco</h1>
Now we can target this title in CSS with .title. The CSS rule looks like the following:
.title {
  font-size: 65px;
}
If all goes well the portfolio now looks like this:
What’s next?
→ Continue with Part 4: Development Tools in the Browser.