I thought I’d write one last part of this tutorial series to show how to deploy (that means package and publish) the AddressApp.
Topics in Part 7
- Deploying our JavaFX application as Native Package with e(fx)clipse
What is Deployment
Deplyoment is the process of packaging and delivering software to the user. This is a crucial part of software development since it’s the first contact a user has with our software.
Java advertises with the slogan Write Once, Run Anywhere to illustrate the cross-platform benefits of the Java language. Ideally, this means that our Java application can be run on any device equipped with a Java virtual machine (JVM).
In the past, the user experience for installing a Java application hasn’t always been smooth. If the user didn’t have the required Java version on his system, he had to be directed to install it first. This lead to some difficulties, e.g. need for admin rights, compatibility issues between Java versions, etc.
Fortunately, JavaFX provides a new deployment option called Native Packaging (also called Self-Contained Application Package). A native package is a bundle containing both your application code and the (platform-specific) Java Runtime.
The official JavaFX documentation by Oracle contains an extensive guide for all possible JavaFX deployment options.
In this post I will show how to create a Native Package with Eclipse and the e(fx)clipse plugin.
Create a Native Package
The goal is to create a self-contained application in a single folder on the user’s computer. Here is how it will look like for our AddressApp (on Windows):
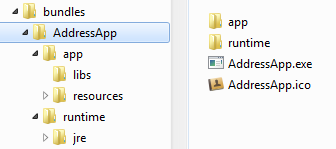
The app folder contains our application data and the runtime folder contains the platform-specific Java runtime.
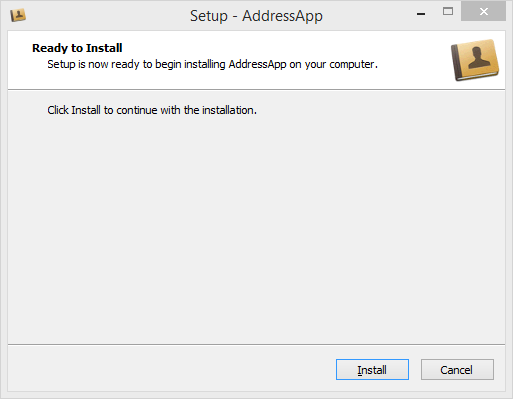
To make it even more comfortable for the user, we’ll provide an installer:
- A
exefile installer on windows - A
dmg(drag and drop) installer for MacOS.
The e(fx)clipse plugin will help us generate the native package and installer.
Step 1 - Edit build.fxbuild
The file build.fxbuild is used by e(fx)clipse to generate a file that will be used by the Ant build tool. (If you don’t have a build.fxbuild file, create a new Java FX Project in Eclipse and copy the generated file.)
-
Open
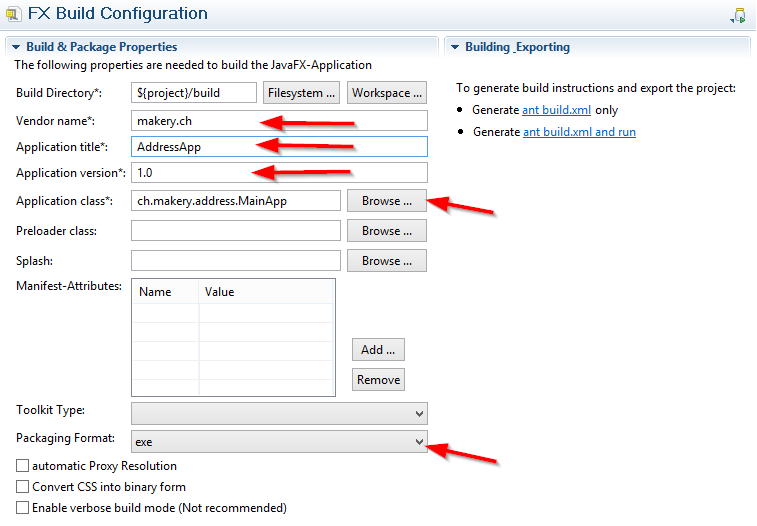
build.fxbuildfrom your project root. -
Fill out all the fields containing a star. For MacOS: Do not use spaces in Application title as this seems to cause a problem.
-
As Packaging Format choose
exefor Windows,dmgfor MacOS, orrpmfor Linux. -
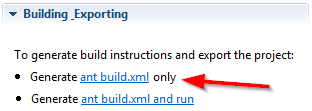
Click on the link
Generate ant build.xml only(found on the right side).
-
Verify that a new
buildfolder and a filebuild.xmlis created.
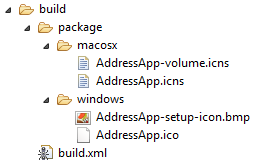
Step 2 - Add Installer Icons
We would like to have some nice icons for our installer:
- AddressApp.ico for the installer file icon
- AddressApp-setup-icon.bmp for the installer splash screen icon
- AddressApp.icns for the mac installer icon
- AddressApp-volume.icns for the mac desktop icon
- Create the following subfolders in the
buildfolder:
build/package/windows(only used for windows)build/package/macosx(only used for macos)
- Copy the corresponding icons from above into those subfolders. It should look something like this now:
- Important: The name of the icons must exactly match the Application title you specified in
build.fxbuild:
YourAppTitle.icoYourAppTitle-setup-icon.bmpYourAppTitle.icnsYourAppTitle-volume.icns
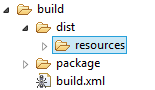
Step 3 - Add Resources
Our resources folder isn’t copied automatically. We must manually add it to the build directory:
- Create the following subfolder in the
buildfolder:
build/dist
- Copy the
resourcesfolder (containing our application images) intobuild/dist.
Step 4 - Edit build.xml to include icons
E(fx)clipse has generated a file build/build.xml which is ready to be executed by Ant. Our installer icons and resource images just won’t work.
As e(fx)clipse can’t be told (yet?) to include additional resources like our resources folder and the few installer icons we’ve added above, we have to manually edit the build.xml:
Open build.xml and find the path fxant. Add one line for the ${basedir} (will make our installer icons available):
build.xml - add “basedir”
<path id="fxant">
  <filelist>
    <file name="${java.home}\..\lib\ant-javafx.jar"/>
    <file name="${java.home}\lib\jfxrt.jar"/>
    <file name="${basedir}"/>
  </filelist>
</path>
Find the block fx:resources id="appRes" further down in the file. Add one line for our resources:
build.xml - add “resources”
<fx:resources id="appRes">
    <fx:fileset dir="dist" includes="AddressApp.jar"/>
    <fx:fileset dir="dist" includes="libs/*"/>
    <fx:fileset dir="dist" includes="resources/**"/>
</fx:resources>
Somehow, the version number doesn’t get added in the fx:application which makes the installer always default to version 1.0 (as pointed out by a few people in the comments). To fix this, manually add the version number (thanks Marc for finding out):
build.xml - add “version”
<fx:application id="fxApplication"
    name="AddressApp"
    mainClass="ch.makery.address.MainApp"
    version="1.0"
/>
We could already run the build.xml as an Ant build at this point. This would generate a runnable jar file of the project. But we want to go a step further and create a nice installer.
Step 5 (WINDOWS) - Windows exe Installer

With Inno Setup we can create a Windows Installer of our application as a single .exe file. The resulting .exe will perform a user level installation (no admin permissions required). Also a shortcut will be created (menu or desktop).
-
Download Inno Setup 5 or later. Install Inno Setup on your computer. Our Ant script will use it to automatically generate the installer.
-
Tell Windows about the installation path to Inno Setup (e.g.
C:\Program Files (x86)\Inno Setup 5). To do this add Inno Setup to thePathvariable in your windows environment variables. If you don’t know where to find it, read How to set the path and environment variables in Windows. -
Restart Eclipse and continue with Step 6.
Step 5 (MAC) - MacOS dmg Installer
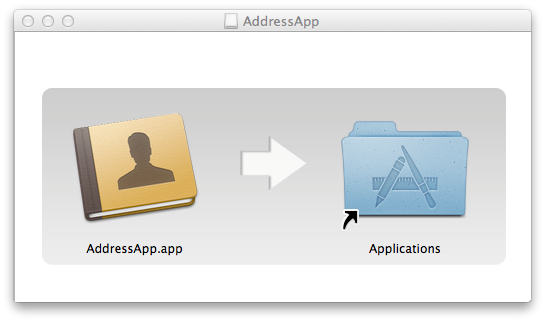
To create a Mac OS dmg drag-and-drop installer, no additional tool is required.
Note: For the installer image to work it must have exactly the same name as the application.
Step 5 (LINUX etc.) - Linux rpm Installer
For other packaging options (msi for windows, rpm for Linux) see this native packaging blog post or this oracle documentation.
Step 6 - Run build.xml
As a final step, we run the build.xml with Ant: Right-click on the build.xml file | Run As | Ant Build.

The building will take a while (about 1 minute on my computer).
If everything was successful, you should find the native bundle in the folder build/deploy/bundles. This is how the windows version looks like:
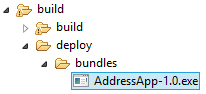
The file AddressApp-1.0.exe can be used as a single file to install the application. This installer will copy the bundle to C:/Users/[yourname]/AppData/Local/AddressApp.
What’s Next?
I hope this tutorial was a help for you to get started with JavaFX and you’ll be able to write your own JavaFX project from here.
I appreciate any feedback. Feel free to write comments if you have any suggestions or if something was unclear.